Getting Started
Prerequisites
Section titled “Prerequisites”- Open Agent Kit installed (
pipx install oak-ci) - Ollama (Recommended for local embeddings) OR any OpenAI-compatible embedding service
Activation
Section titled “Activation”Run oak init in your project directory:
oak initThe interactive setup walks you through two screens:
- Agent selection — Choose which AI coding agents to configure (Claude, Cursor, Gemini, etc.)
- Language selection — Choose which programming languages to install AST parsers for
What this does automatically:
- Installs the CI daemon and CLI tools
- Installs AST parsers (tree-sitter) for the selected languages
- Configures Agent Hooks for supported agents
- Registers MCP Servers for agents that support it
- Updates IDE Settings (VSCode/Cursor) for optimal integration
Starting the Daemon
Section titled “Starting the Daemon”The CI feature runs as a background daemon. Start it and open the dashboard:
oak ci start --openOn the first run, the daemon will:
- Scan your codebase to detect source files
- Build the index — Begin indexing your codebase using the installed parsers (may take a few minutes for large projects)
The dashboard opens automatically in your browser — you can watch indexing progress in real time.
Configuration
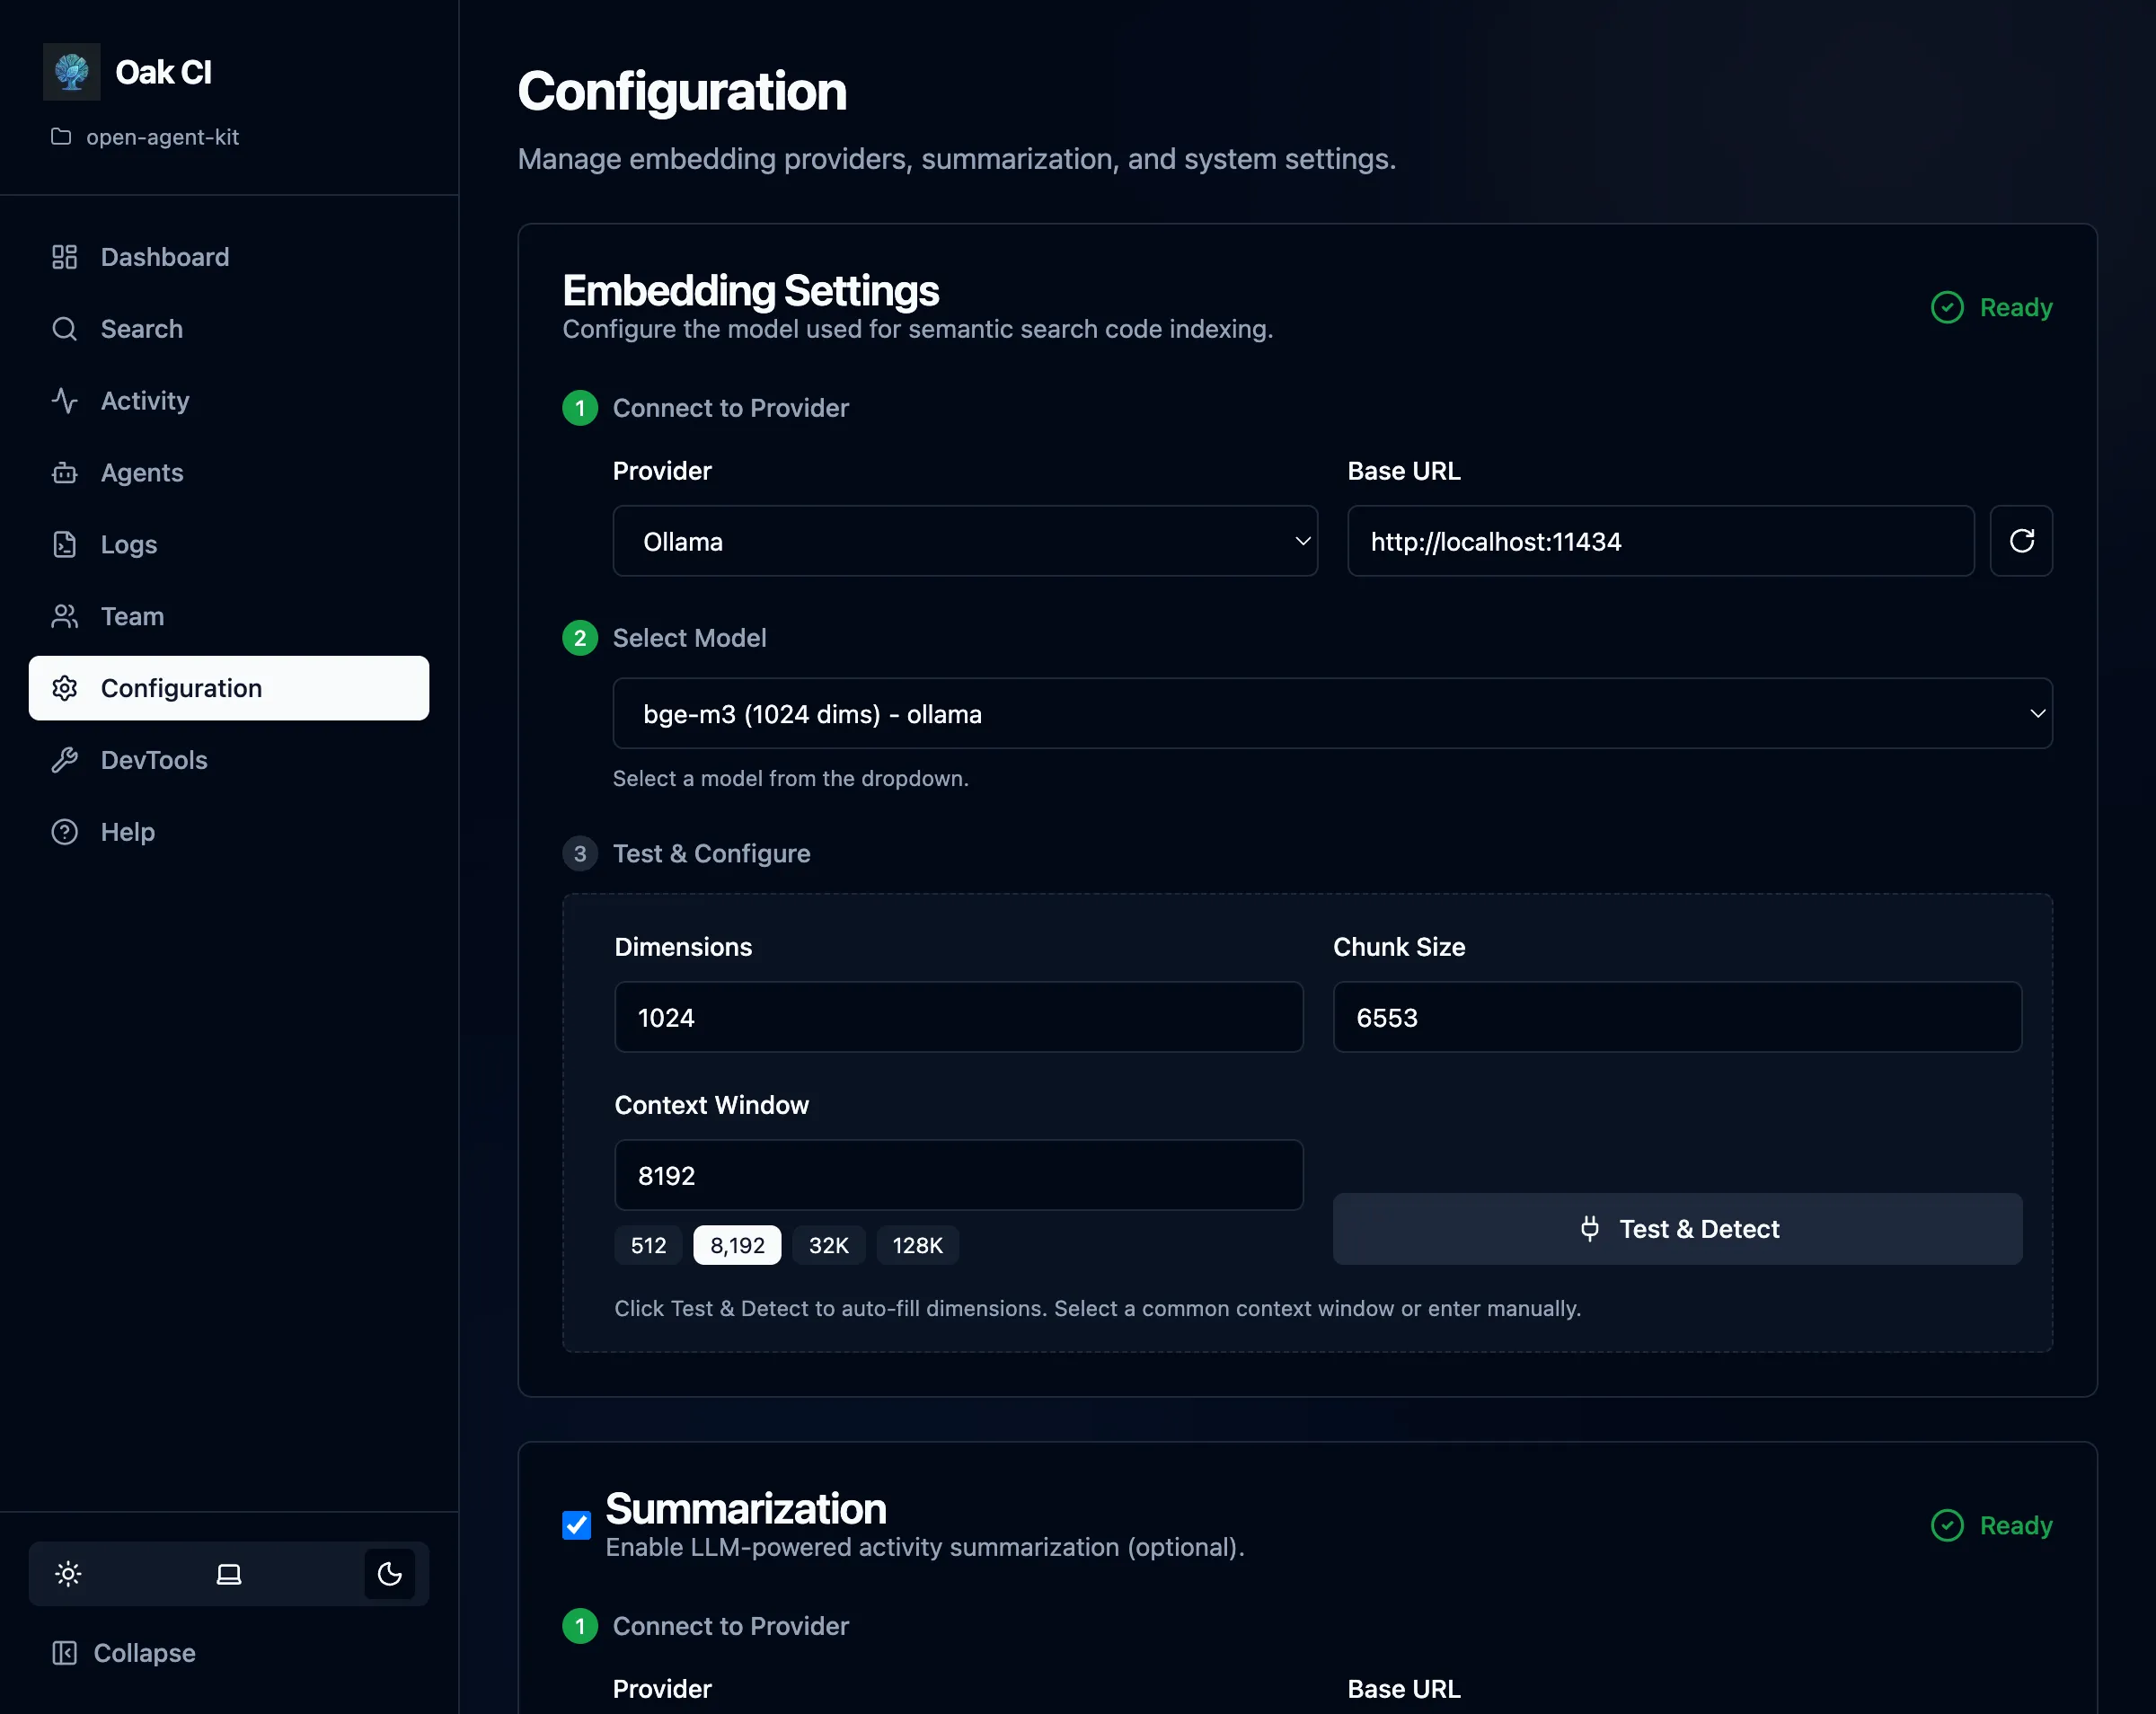
Section titled “Configuration”After the daemon starts, use the dashboard to configure everything. Open the Configuration page from the sidebar to:
- Choose your embedding provider — Select from Ollama, LM Studio, or any OpenAI-compatible endpoint. The UI auto-detects available models and dimensions.
- Enable summarization — Optionally connect a local LLM for automatic session summaries.
- Tune session quality — Control when background jobs process sessions:
min_activities: minimum activity count before a session qualifies for background processing (prevents summarizing empty or trivial sessions)stale_timeout: how long an inactive session sits before cleanup by background maintenance
- Manage exclusions — Add directory patterns to skip during indexing (e.g.,
dist/**,vendor/**). OAK includes sensible defaults (.git,node_modules,__pycache__, etc.) and respects.gitignore.
Establish Project Rules
Section titled “Establish Project Rules”Once OAK and your agents are set up, use the /project-governance skill to create a project constitution — a living document that codifies your team’s engineering standards so AI agents follow them consistently.
From any configured agent, run:
/project-governance Let's establish our project's constitutionThe agent will:
- Analyze your codebase for existing patterns (testing, linting, CI/CD, project structure)
- Check for existing agent instruction files (
CLAUDE.md,AGENTS.md,.cursorrules, etc.) and use them as context - Create
oak/constitution.mdwith standards tailored to your project - Update agent instruction files to reference the constitution (additively — your existing rules are preserved)
This works in both greenfield projects (no existing rules) and brownfield projects (existing conventions that should be formalized).
As your project evolves, use the same skill to amend the constitution when new rules are discovered:
/project-governance Let's ensure we always follow the vertical slice architectural patternAfter updating the constitution, sync the changes to all agent instruction files:
oak rules sync-agentsSee the Skills page for the full /project-governance reference.
Verify Installation
Section titled “Verify Installation”Open the dashboard home page to verify everything is working:
- Files Indexed: Shows the number of source files tracked
- Memories: Count of stored observations
- Sessions: Agent sessions being tracked
- System Health: Embedding and summarization provider status
You can also check from the terminal:
oak ci status